Thursday, December 20, 2012

Immediately After an Encounter with a Burglar


Immediately After an Encounter Part IV
Getting good legal advice is important
 
For the record, I am not an attorney and I do not represent myself as such. Nor, do I pretend to give you legal advice. I am simply giving you suggestions. The best case scenario, is that you learn the gun laws of your state and speak to an attorney BEFORE you purchase a gun.
Good legal advice is as necessary as gun training, so do both, take a gun training course and obtain legal advice  BEFORE your purchase.
 
I want to say here, that I understand good attorneys are not cheap and if talking to one is too expensive? Talk to a few of your fellow gun enthusiasts and chip in together to obtain the advice. Make an appointment, pay the consultation fee, ask questions. But most important of all? Listen to what he says about what to expect from the system and how it works.
 
When selecting an attorney, don't just go to any attorney. You want to speak to a criminal defense attorney. Someone who knows how the system works and has a good reputation. They will generally know the prosecutor and even may know the arresting officer from previous cases. If you say you don't know how to find this information? It is readily available for free, in any state. You can even go online and check the law registry of the state and city where you live, to obtain the information.
 
Now none of what I am telling you is to imply that you should not cooperate with the police. I am suggesting that there are alternatives you can take until your mind is clear and you have legal advice available. Be smart. Good, law abiding, honest citizens, should be willing to cooperate with the law, always. Just make sure you do so in the right frame of mind (preferably after the adrenaline has worn off) and your mind is clear.
 
Once so, you should always have or you should always want....someone sitting next to you who is well versed in the law Someone who can help you calmly through the questions from the police.
 
Simple suggestions, but I encourage you to research the laws where you live, consult a criminal defense attorney and most of all, be sure that you understand your responsibilities and rights. Thanks for reading--


Wednesday, December 19, 2012

Immediately After an Encounter with a Burglar


Immediately After an Encounter Part III
 
If you have shot someone who was attempting to rob you, there are some simple and basic steps to take. First, after you have contacted the police, it is advisable to contact an attorney. Once both are done, sit back and clear your mind so that you can recall exactly what happened. Upon the arrival of the police, be prepared to show proper identification and they are obligated to advise you of your rights before you answer any questions. Remember...before you answer any questions, they must advise you of your rights. It is also advisable to exercise your constitutional rights to say nothing until your attorney arrives. This is one of the rights that the police will explain to you, so you are doing nothing wrong by not speaking to them.
 
After being advised of your rights, make a brief statement. Something similar to this:  
 
"The reason I shot this person, is that he tried to rob me and it put me in fear of my life. I had to shoot him. I would love to talk to you further, about everything that has happened, but I want my lawyer to be present when I do that."
 
You then stop talking until you are with your attorney.
 
The police however may take a different view, so you must expect, and be prepared for,  being handcuffed immediately and taken to jail. All because you exercised your rights. These same rights as just outlined by police. But.....it is part of the process. Remember, the police are only doing their job. The best possible answer after your brief verbal statment, is that your response be nothing more, than you wish to speak to an attorney.
 
Remember, you are doing nothing wrong by not speaking with the police immediately. There is a reason for this. The most glaring fact, is that the reason it is inadvisable for you to speak to the police at this stage, is that you are still under the effects of adrenaline. In this state, you could say anything. You could get the facts wrong or worse, mixed up. When your adrenaline is pumped, you are at an emotional high and may even use inappropriate language in front of the police. This state  produces emotions that may may also distort the facts. 
 
Just remember, at this state, anything you say or do....IS admissible in a court of law.
 
Tomorrow, the final installment in this series. Thanks for reading and I'll see you on the trail---

Monday, December 17, 2012

Immediately After Encounter with a Burglar


Immediately After Encounter
 
In the immediate aftermath of an encounter, whether shots have been fired or not, you should NOT have your weapon in your hand when the police arrive. If the situation is still critical, i.e.: you are holding the perpetrator at gunpoint, have a relative go outside to notify the police that a suspect is being held on the ground by a legally armed citizen. You do not want the cops bursting in and shooting you by mistake. Remember, their adrenaline in at a high level also and this can be a dangerous and confusing time
 

Scenario # 1
You let the perpetrator go
 
If there is no one to help you in this situation, it may be best to just let the perpetrator escape and let the police chase them down. If this is the case, dial 9-1-1. Identify yourself and give this explanation only: "A person just tried to rob me and they got away, please send police." Then give your address. It's not advisable to give any further information over the phone. Now, sit down and collect your thoughts so you can give a cohesive and thorough description of the perpetrator to the police when they arrive. Also make sure your weapon (if you have one) is holstered or in plain sight away from you when they arrive.
 
The honest citizen should always cooperate with the police or be willing to help when possible. After all, they are there to help.
 
Scenario # 2
You have discharged your weapon
 
You have discharged your weapon and the perpetrator is wounded. Dial 9-1-1. Identify yourself, using something like this example: "A person just tried to rob me and I shot him. Please send police and an ambulance to...."  Give your address. Again, it is not advisable to give any further information over the phone. If the situation is peaceful, make sure your weapon is holstered or away from you when the police arrive.
 
At this stage, there is a lot of discussion as to what is best to do, and what is not best to do. What you should say and what you should not say to the police. Cooperation of course is always the best, but you must be in the correct frame of mind to give any statements.
 
Tomorrow, I will go over some different trains of thought on just this. Thanks for reading--
 

Saturday, December 15, 2012

What to do after a self defense confrontation

Good Morning. 

I have been relaxing these last few weeks and I have noticed an upswing in crime. What with all of the home invasions and brazen daylight robberies happening in neighborhoods across the nation, I thought I would cover something that we all talk about, but that no one seems to want to admit that they know nothing about. We are afraid in our own homes sometimes, and some of you may have even thought of purchasing a home defense weapon, I suggest you read this first. Then get some more information from a local defense attorney where you live, so that you know the local laws. Then talk to a gun shop owner about the type of weapon you are interested in and why. Learn about training classes available, all of the above......before you purchase a home defense weapon. Read on.


What to do after a self defense confrontation

 
Everyday, there seems to be another story of a homeowner defending themselves against burglars. Daily, there are articles of people buying guns to protect themselves. Gun sales are up and the anti-gun lobbyist's are in the news with negative spin about guns. Who is right? Up to you to decide. But if you do decide to protect yourself, there are some basics. The times we live in, with the economy being as it is, has caused for the spike in crime, or has it? Is the crime actually going up, or is it going down? Are home owner's becoming more paranoid, or smarter? There seem to be several points of view, so let's discuss a few.
 
First and foremost, if you don't know the gun laws in your state, you are obligated to find out. Ignorance of the law is no excuse. Your local gun range should carry books pertaining to the gun laws of your state. The library and of course, the Internet, is swarming with information. Arm yourself with information (no pun intended) before considering a gun purchase.Find out what the self defense laws are in your state. Don't guess, know. 
 
Once you have learned what you need to know about the gun laws of your state, talk to someone about a self defense course and how to use the weapon you choose. Finally there is one more thing to talk about, and that is a concealed handgun license (CHL). It is important for you to understand, having a CHL does not give you a free license to use your weapon, it simply means that you have taken instruction and are licensed to carry. Unless you need a weapon in the course of your duties for work, there is usually no need for a CHL. Again, the choice is your own and the laws of your state.
 
A healthy conversation about guns, about their use (training) what kinds of ammunition to buy and so forth are all good. Knowing gun safety, gun tactics, cleaning, carrying, etc is all great. But none of it trains you for what do if you discharge your weapon in a self defense encounter. Even if you don't fire your weapon, your adrenaline level is going to be high and all sorts of emotions will be flooding up. This moment, right after a confrontation, is a very emotional and confusing time. Not to mention, the police will be right there... wanting an explanation. It is up to you, to know what to do at a time like this.
 
Over the next few days, I am going to go over some simple things for you to think about and do, to organize yourself in case you are ever in a deadly encounter. The police will want to know a truthful accounting of what happened. The information I am going to give you, is all common sense and hopefully will help you to remain calm when truthfully reiterating the course of events, to the police. As I said in the beginning of this blog, there are some basics. Thanks for reading and I'll see you on the trail.


Wednesday, November 28, 2012

Extending the Life of your Ski Skins

Good Morning,


Today is my last blab about ski skins  I thought it would be helpful to share some tips with you about how you can extend the life of your ski skins. None of us like having to continually invest in new ones, so here are a couple of easy things you can do. 

First,  choose a set of ski skins with a good adhesive. Next, make sure they fit the waist of your ski through the tail, really well, (you don't want them to extend past your ski edge). The reason is, is that this is the part of the ski that's going to be doing most of the uphill work. Talk to your ski retailer if you need help and you can even have your retailer trim them to fit.
Cheat Sheets for Ski Skins
Take the time to invest in some cheat sheets. These are sheets to lay against the adhesive side of your skins as you fold them to put them away. This will allow the adhesive to be less stressed because it is not sticking to the fabric and your glue will last longer.
Buy yourself some good glide wax, and use it each time before you ski. Your retailer can recommend a good brand. Finally, for added ski skin longevity, always comb your skins when done skiing. Do this, by starting from the tip of your ski skin to the tail.


I hope this short series has answered some of your questions, and gave you a good overview of what these are and why you would want to have a pair of ski skins. Thanks for reading. I'll see you on the trail-- Campingman

Tuesday, November 27, 2012

Ski Skins: A Brief History Overview


Good Morning,

Today I want to talk briefly about the history of ski skins and give you an overview of the different kinds to help you make an informed decision before buying any of your own. 

Mohair Ski Skins
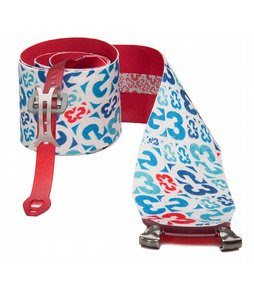
Before modern day ski lifts were invented, ski skins were the accepted method of getting to the top of a slope to be able to ski down, or to go cross country to a neighbor's house or whatever. They enabled you to get around faster and easier in the snow, ok? They were originally made from seal "skins", hence the name ski "skins." Luckily for you, (and our seal friends) they are no longer made from seal skins. There are two actual types of material used to make them, and a third, sort of variant of the first two. These two types of material are Mohair and Nylon. There is a third variant as I said, a mix of Mohair and Nylon.


Which is better?

The Nylon ski skin is the least expensive, the most durable and best for climbing. It is though, the slowest for gliding. The Mohair ski skin is the best for downhill skiing and for climbing, as the Mohair reacts much like seal skin. By that, I mean, when the Mohair fabric is swept in one direction, it lies flat (great for skiing) and when the fabric is swept in the opposite direction, it stands up. Thus, providing the resistance for climbing with your skis on. Just slide your ski forward and then back ever so slightly, step down on the ski for the traction, and there you have it. That's how simply they work. The third type, Mohair mix is the least expensive and pretty good for down hill, and average for climbing. But the item of interest?  They tend to be the least durable of the three types of skins. 

Nylon Ski SKins


Let's face, they will all wear out, but give yourself an edge. Lots of companies make these, so take your time and read up on the type or brand you choose, before you buy.

Buy the skin that you feel is best for your skill set and/or needs. Tomorrow I will do a quick wrap up on these puppies! Until then, stay safe, and I will see you on the trail. ~ Campingman

Monday, November 26, 2012

Ski Skins... what are these?


Good afternoon everyone,

I hope you all had a great Thanksgiving. I know I did, and I am still stuffed. Deep fried turkey ...mmmm, so good! Anyway, before I digress too much, I wanted to introduce a new topic: ski skins. I plan on sharing quite a bit over the next week or so, so today is just an introduction.

What are ski skins? Or what are climbing skins? I'll bet that I have heard those two questions asked hundred's of times over the years, so I thought I would share some of what I know about this (oft times) little known product. I find that once I explain what they are and what they are used for, our circle of back country skiers using ski skins increases exponentially. So, here's a brief overview.


First, why the two names ski skins and climbing skins? Easy answer. They are the same thing, and here's how......skins (strips of material) that are placed over a pair of skis, to allow you to climb up slopes before skiing down? Get it? The next question is: "Why would you want to do that when you can just take the chair lift?" Again, an easy answer.

If all you want to do, is ski down a groomed ski lodge manufactured slope with about forty gazillion other skiers, then a pair of skiing skins are not for you. Simple as that.


However, should you want to explore some of the back country or even do some cross country or wilderness skiing? Then ski skins are a great way to do just that. I suppose I don't have to mention, that normally, there are no lifts in the back country, so there must be alternatives? That's where these Ski skins come in, as they are designed for adventuresome skiing or skiing in places where there are no lifts. Tomorrow I will take that story back a bit to see (briefly) where the idea for these came from. Until then, keep safe and I'll see you on the trail. - Campingman


Friday, November 9, 2012

Dagger Green Boat Kayaks - Get in Shape because it's going to burn!


Good Morning,

Now that I've finished up my series on all the various tents you can consider for your different outings, I wanted to return back to where my blog started: the Dagger Green Boat kayak. In my earlier post I just introduced you to the boat. In this post I want to talk more about what it's like to actually use this kayak and how you can prepare your body.

The Dagger Green Boat is a fabulous first kayak, river kayak or just about any water kayak, with the exception of shallow tight micro creeks. It's an incredibly fast, nimble boat and turns easily. But, like anything, you must learn how to use your skills with this boat. It doesn't matter if you've paddled many a kayak before, the following section applies to you just the same as a novice. A good skill set is learned over time, and long boat Kayaking is no different. The basic thing needed for any kayaking? Be in good shape!

Getting in shape
If you've never kayaked before, and think you want to get into this sport, there are some simple things to do before going out and just buying a kayak. Upper body strength is a must, because you are going to be paddling, sometimes with ease, and sometimes with real spirit. But paddle you will. Want an idea? If you have access to a canoe, or even a small row boat, try to row that boat, or paddle that canoe upstream fro about 30 minutes. If you can't do 30 minutes, try 15. The point being, is that unless you are already in shape (and even if you are) you are going to be using different muscles than you use for most anything else. You will find that your arm and shoulder muscles will be burning after just a few minutes. Grab some books or videos on conditioning for kayaking. Your leg muscles shouldn't be neglected either, as you will be using them to help brace your upper body as you paddle through eddy's, over drops and across white water pools. Condition, condition, condition.

Paddling
The Dagger Green Boat is a mixture of speed, volume and maneuverability. It accelerates quickly, with a bow up scheme, and it's so easy to boof, you're going to love it. You have to change your timing though, to accommodate the extra length of this boat. You still start your paddle in the same spot, but, for the DGB, you have to re-learn the basics and fine tune them. fFr instance, how to carry the stroke further. The reason you carry it further, is to maintain your lift, as you are  waiting for your stern to separate. Once you learn this small habit change, you will blast over holes and through eddy's with ease. Long boats like the Dagger Green Boat Kayak, love to be paddled forward. They are designed for aggressive water handling. That being said, this boat is still easy to turn and you will find it super stable through rapids. It is designed, as I said to steer quickly, turn and/or dig in to get you downstream.
Speed
For a big boat, this boat is fast, and it's knife like design easily cuts through chops and eddy's like a hot knife through butter. I've also heard, that some kayaker's call this boat "lively." But...there is a sector of our kayaking community however, who feel the boat is 'tippy' to coin a phrase.  In researching this, I found that for the most part, these remarks were generally from beginning kayakers, or people who started out kayaking in big, flat, wide, kayaks. (to be fair, of the folks I talked to, about 93% fell into this category, while the remaining 7% were experienced kayaker's, but previous user's of smaller boats.) Mostly, they find themselves moving into 'real kayaks', (to coin another phrase) and find that not all kayaks have wide flat bottoms. Now, that aside, I am here to tell you, this boat is very stable. To clarify, yes, it can become twitchy if you're back paddling and not paying attention, but so do most boats. The rounded bottom however, will take a bit of getting used to. Once learned, you will find you are in the NASCAR racer of kayaks.


Advantages
In addition to their inherent speed qualities, long boats are also more forgiving when it comes to down angles The bow of the Dagger Green Boat kayak will actually deflect and resurface before the stern has landed, thus giving you more forward speed as you drop and pull away from the curtain. This kayak is great for white water tripping as well as pool drops. Class III's, IV's or V's? No problem. Your Dagger Green Boat punches holes through them like a missile. The knife like design, leading the way. Your DGB cover's all categories of kayaking with ease, regardless of whether you are going upstream or down, beginner to expert. There is no other kayak that performs as well as the Dagger Green Boat.

Monday, November 5, 2012

Kelty Acadia 2 Person Tent, a 3 Season tent


Good Morning,

OK...we're down to the final entry in this series on tents. Besides the Kelty Gunnison tent for an extra tent or as I use it here, a storage tent, I want to talk about the Kelty Acadia 2 tent. This particular series of tents by Kelty (the Acadia line) come in 2 , 4 and 6 person tents. For today however, we are going to focus on the two person tent only. 

Now, both tents (the Gunnison 1.1 and the Acadia 2)  are considered to be 3 season tents, but that does not mean you cannot use them year round. Once again, let me say: "most any tent can be used all year round, if properly supported and water proofed, externally or internally." With that thought in mind, plan for any eventuality. If you know you are going to be in an area you expect snow or rain, just brace and cover your tent accordingly. Simple preparation for a great trip is all it takes.

Kelty Acadia 2 Person Tent Cover
In the case of this Kelty Acadia tent, the 32 square feet of interior storage space is enormous. It even has interior wall pockets to maximize floor space. Set up of this free standing tent, is a simple three pole, snap design. (clips that attach to the poles.) Once set up, the double door design (both of them very large) allow for quick access to your stored items. How many times have you stored something in a tent and find yourself crawling all over to locate it? Well, with the double door design, you simply go around to the other side and access the rear without crawling all around.  In harsh, wet, or icy weather, take a tube tent to use as ground cover under your tent, always. The floor and tent seams are taped. Walls are non see through mesh, and there are numerous guy out points for staking and support.


One advantage of the double vestibule, is that it not only helps keep the interior dry, I find, that they offer a great place to store your firewood to keep it out of the weather. With the double vestibules, you have twice the storage space (23 additional square feet to be exact). The fiberglass tent support poles utilize "wrapped construction" for extra strength, but the brow pole (which holds the rain fly) is made from DAC Hybrid Aluminum. The letters DAC are an abbreviation for "Dongah Aluminum Corporation", a dedicated tent pole manufacturer whose entire purpose is to build stronger, safer and lighter poles for the camping community. 

This line of Kelty tents, although I speak of them as storage tents, also come in handy as lightweight hiking/camping/kayaking tents through the rest of the year.. I am sure that you will find even more uses for these two great tents, yourself.

Thanks for reading, hike safe and I'll see you on the trail-- Campingman

Savings on Outdoor and Kayak Gear - Free Shipping

Friday, November 2, 2012

Kelty Gunnison 1.1 Tent - The perfect "extra tent" for gear and more.


Good Morning,

We've spent the last few days on harsh weather tents and their use. One thing I did not cover, is taking along, an extra tent for gear storage when hunting, or camping. As an example, when I take off to go hunting, it's usually for a bout a week at a time. I carry enough food for that week, as well as the ancillary gear necessary to maintain myself when out there. This fact necessitates getting my truck as close to the area as possible, without creating an intrusion on the environment. It also entails, generally making two trips from my truck to my campsite, in order to get everything up there. So, besides a tent for me to sleep in, I carry a small lightweight tent to store, extra dry clothing, canned goods, waterproof materials if needed, etc. I take a tent along, that I also use when kayaking or just hiking for a few days. It serves double duty that way and is used nearly year round.

With that in mind, I like the Kelty Gunnison 1.1 tent. It's light weight (just over 3 lbs.), inexpensive and super easy to set up. It has adequate ventilation for storing things w/o drawing a lot of extra condensation. Why the extra weight and effort of taking a second tent? Simple. Taking a spare tent, allows for maximum room in the sleeping tent, or, even better yet, a place to get out of the weather to cook in and eat. It has a single door and stay dry vestibule. I cannot speak enough about having a small lightweight, extra tent to store your extra gear and firewood. It just makes your sleeping tent so much more comfortable. Besides, when you're kayaking, this makes an excellent overnight tent for those weekend getaways. By no means, do you have to just consider this a single use tent.

This tent is waterproof from the factory and I took it out for the first time without sealing the seams (something you do on most tents). Just a quick weekend trip to do some fishjing in a local lake of ours. You guessed it... ...I was caught in a Texas sized downpour for well over 40 minutes. If you've ever been in a rain storm in the south, you know what I mean. Plus, the wind was blowing to beat all, but this little tent stood up to everything nature threw at me that day and I stayed warm and dry. I am sure it's bathtub floor design, had a little something to do with that. Plus, the seams are all sonically welded at the factory. So, there you have it, a dual purpose tent, (extra storage at base camp or Kayaking/camping/hiking overnighter). You have it all with this little Kelty tent.


That's it again for today, hike safe and I will see you on the trail-- Campingman
Outdoorplay.com - Free Shipping on ALL orders

Wednesday, October 31, 2012

First Aid and Safety- Take a First Aid Kit


First aid kits
You know, I hear from a lot of people, asking about first aid kits. Many are concerned about weight, the cost, or buying the wrong size, or even not wanting a certain kit because they feel it is too bulky. Let me just say this, there is no substitute for having the right first aid kit for the right injury. I'll tell you a little story, about of of my first forays into the wilderness to help put into perspective of how important the right kit is. It was years ago, but having just gotten out of the military, I understood the value of having the right first aid kit. Unlike many of my friends, I packed along each trip, a military style first aid kit. Now if any of you have ever seen one, they are fairly large, bulky even. They include items we do not normally associate with first aid. Items my friends said I would never need and I was carelessly carrying extra weight. This went on through the spring and summer as we ventured around the mountains and deserts of south and south eastern California, one weekend after another.
Finally, toward mid fall, we were camping somewhere north of the Joshua Tree National Forest. (it's way east of Los Angeles, if that will give you a clue) Anyway, the group of us hiker's also rode motorcycle's on and off in those days. Dirt bikes, not street bikes and this particular weekend was one of those "on" weekends where we rode dirt bikes. Now, before I get too involved in the story, I should tell you. If you are not familiar with California, their deserts and mountains are pocked with old mines. Mines of all kinds, silver, gold, whatever. Most all of them abandoned these days. Some mines were sunk into the sides of mountains like you see in the old westerns, others were just dug straight down, where ever and when ever. They were always kind of fun to go into, although we sounded brave, we never ventured any deeper than the past the light from outside penetrated. But, even at that, we found all manner oc collectibles, old bottles, abandoned plates and silverware, some mine car harnesses (the metal parts, as most of the wood had rotted away) and other things we as kids, deemd "valuable.".
 
 It so happened that this day, that we were riding across a wide open desert basin. Close your eyes now and imagine a 'U' shaped valley, ringed on three sides by mountains and a flat desert floor, completely denuded of vegetation. I can still remember the stark whiteness of it as we rode across it. Nothing growing or alive anywhere. We were headed for a mine someone had seen the day before. Picture, five motorcycles riding abreast, about 30 or 40 feet apart, riding across this desert floor. None of us noticed anything out of the ordinary, least of all my friend. One second he was riding slightly ahead and to my left, the next second his motorcycle was buried nose first in the desert and he was flying. I mean literally tumbling and turning through the air at the same speed as we were (probably 40 or 50 mph). His body slowed and finally hit the ground feet first somehow, and then from there, it got worse before he stopped. I immediately slowed down and rode over to where he had finally landed.
I'll save you the details, but suffice to say he had a compound fracture of his right tibia and fibula and a broken hand. Luckily, other than a lot of lost skin, they were his only major injuries. I had the supplies in my first aid kit, to not only set his leg, but treat the compound fracture for infection and prevent more serious damage before we could get him out of there. I was also able to immobilize his hand and clean up the scraped and abraded skin and make him comfortable. We even rigged the emergency blanket as a sunshelter while one of the others went for help. (no cell phones in those days) Never again, did my friends say anything about my first aid kit. In fact they went out and bought similar one's of their own.
The long and the short of it was, that it took us nearly four hours for rescue to get there and get him transported to a town called Twenty Nine Palms, to a hospital. Had we not been able to treat him for his injuries and for infection at the site? Who knows what the turn of events could have been? Needless to say, my friend is walking and talking still, with nothing more that a few scars to mark that day. I'm not saying you have to buy and carry what I do, but for gosh sakes, at least buy something besides one of the standard kits. You never know when you will need the right kit. Always be prepared. Over the years, I have sewn up cuts, set broken legs and arms, butter fly bandaged all manner of cuts, just to help people while before they were able to get to a doctor. My final thoughts; its better to be safe on the trail by being prepared... always take the right first aid kit for the trip.
Remember, be safe and I'll see you on the trail! Campingman

Mountain Hardwear EV 3 Tent


Good Morning,


As I said in my previous post, the Mountain Hardwear EV 3 tent is what I consider, the "Big Brother" to the EV 2 tents.  Again, designed with the help of Ed Viesturs, in that this tent too is compact, light and strong, utilizing TX107 PU fabric (a fabric that is non stretch laminate, that stabilizes and strengthens when set up.) It's interior zipper along with the 5 welded, adjustable vents, works well with frost management and protection from the elements. 

OK, remember that I said I would talk a bit more about Ed Viesturs? Well, he is a native of the state of Washington and is widely regarded as one of the country's foremost high altitude mountaineers. Not only is he a professional mountaineer, but he works as a design consultant for several prominent equipment manufacturers. Hence, the initials on this line of tents, EV. His simple motto: "Climbing has to be a round trip."

My motto, which you have repeatedly read in my blogs : "Plan your trip, plan your gear, plan your exit" follows right along with Ed's (Although I think his motto was first).  Ed has successfully climbed all 14 of the world's 8,000 meter peaks, without supplemental oxygen. He is the first and only American climber and just one of a handful to accomplish this. You can see from his credentials, that he is eminently qualified to help design anything related to mountain climbing. Which brings me full circle, to the EV 3.

As you may have guessed, by the name, this is a three man tent. I however, use it as a two man tent with gear. This tent incorporates many of the design features of the EV 2, with the addition of an integrated vestibule area, which allows for space for boots and other sundry items near the door. More interior space for gear, and excellent venting. Again, with the zippered snow port in the floor, for excess snow removal you drag in, w/o the necessity of unzipping the tent. It's simple and fast to set up, much as the EV 2, but with the added interior capacity. Weighing in at 6 lbs. you will find it more than adequate and light for hiking. What all of this means? It truly is a cold weather tent. Mountain Hardwear knows how to make great tents and you will love this one.

That's it for today, I will conclude my series on the tents in the next few days., again, thanks for reading and I'll see you on the trail-- Campingman

Savings on Outdoor and Kayak Gear - Free Shipping

Tuesday, October 30, 2012

Mountain Hardwear EV-2 Tents


Mountain Hardwear EV-2 Tents

Good Morning,

As promised, I am going to continue in my series on various types of tents. The harsh weather tents are on my mind right now due to the cold weather I have been hunting in. I love it, but I love it more when I have a warm, dry place to go to at the end of the long day. 

The Mountain Hardwear line has long been a favorite of mine. Not only are they well made, but are durable and backed by a great warranty. The Mountain Hardwear EV 2 tent was designed with the help of Ed Viesturs. For those of you who do not know who he is, I will talk a bit more about him later on. Suffice it to say, if he is involved, there is some serious tent designing going on.
The EV 2 is sold as a two man camping tent, but if you use it for two, it will be a bit snug. I like this tent, because of it's ability to be used a high elevations and in narrow spaces. (such as that ledge you found yourself on last time) Again, let me repeat, it is a single walled tent, and as such, you may find it a bit cold for single camping. Take a good bag and you will be fine. But it is lightweight (right at 5 lbs.) so that makes up for it.
The Mountain Hardwear EV 2 is a tent for high altitudes. What that means, that it is as close to a snow shelter as you can find. It is not designed as a car camping tent, or a summertime tent. .It is designed to be a bunker, to get you out of harsh weather, and lives up to it's reputation. I find the ventilation in this tent is more than adequate, when used properly, which means less condensation, making it safer for indoor cooking. Condensation is a fact of life in a single wall tent, so expect some. Set up with the clips, is fast, simple and easy. You will find that it's inherently narrow design allows it to fit almost anywhere.
Also, as with any tent, slap the door a couple times before you open it, just to knock off any snow. This sturdy little tent holds up in strong winds, even if you forgot to put out the guys or stake it down tightly. Mt. Hood (as many mountains are) notorious for wind gusts through your base camps at night, and this one will stand up to it. There is even a zippered port in the floor of the tent, to provide an exit port for excess snow you drag in.
Next up, a tent that I consider as Mountain headwear's big brother to the EV 2. That's it for today, and as always, hike safe and I'll see you on the trail-- Campingman
Outdoorplay.com - Free Shipping on ALL orders

Monday, October 29, 2012

Black Diamond HiLight 2 person tent


Black Diamond HiLight 2 person tent
Good Morning,

The first two tents in this series are for rugged weather hiking/camping, etc. Whereas, not all of you will have need of double walled construction, but you want something that is water proof right out of the box. With that spiel, I introduce you to the Black Diamond HiLight 2 Person Tent.

 I like this tent, for it's roominess. The two and a half (yes, 2 1/2, I'll explain later) pole design allows for the steep sides and high ceiling.This tent is made and sold, as a two person tent, and it truly is big enough for two people and their gear.  But....if I'm hiking by myself (which is frequent) this tent allows for roomy comfort inside a dry interior. THAT alone, a dry interior, makes all the difference at the end of the long wet day, knowing that your tent is going to keep you warm and dry overnight. Besides, it weighs in at 3 lbs, so it  is comfortable in my pack. It's steep side design, sheds water like a ducks back. 

The canopy  is made with highly water resistant NanoShield fabric. This breathable fabric is proprietary to super light tents such as this. Now, before going further, this tent offers an optional vestibule...buy it, and you will be glad you did, as it allows you the extra room to cook in a semi-covered environment, without having to move all of your gear about. The door and the rear of the tent have mesh enclosures for ventilation.
Now, for the explanation of the 2 1/2 pole design. If you are not familiar with tent's, this can appear confusing. I mean really? What would you use "half of a pole for?" Simple. if you look at the tent, you can see the simple two pole criss cross design for support. The "half pole" is simply inserted into the grommets sewn into the top of the tent and the "half pole" supports the weight for the other two, allowing for a drip free entryway. Simple design.
Next up, a series on Mountain Hardwear tents. I hope you have found the information helpful and as always? Hike safe and I'll see you on the trail-- Campingman

Saturday, October 27, 2012

Black Diamond Squall, 3 person tent


Good Morning,

Black Diamond Squall 3 person tent
 
In keeping with the harsh weather tent concept, I want to expand slightly on the Black Diamond design series, and talk today about the Black Diamond Squall, 3 person tent. You will note, it's design is similar to that of the "Stormtrack Tent, which is another reason I like this tent. Again, with the double walled construction that I have become so fond of, the adjustable front and rear roof vents, to maximize airflow. You will find, with this design, the Black Diamond Stormtracker/Squall series tents can stand up to prolonged mountain weather. Whatever nature can throw at you, this tent can take it.  
 

If you've ever hiked, camped or hunted in Idaho, Montana, Colorado, or Oregon, you know the weather can get downright gnarly in a heartbeat. Sometimes, even before you get to your predesignated camping spot. If that turns out to be the case, this series tents, can take that kind of punishment. The "Squall 3 person tent, has the same taped 2500 mm polyester fly as well as the 5000 mm nylon floor as the Stormtrack.  Again, I suggest using the "Tube Tent" as a ground cover. The interior space is broader, and with the same vestibules front and rear, there is plenty of storage space.
 
The setup is simple and easy, utilizing Black Diamond's "50/50 sleeve and clip fast hub setup process" you heard me mention that phrase in the "Stormtracker tent" post... Well, I'm going to go into that just a bit, so that it makes sense. What that is, is, the utilization of 'sleeves' for the poles supporting the front of the tent and 'clips' to support the rear of the tent. These clips attach to the poles in the rear, allowing setup to be accomplished easily by one person. The hubs, are the ingenious design of inserting the poles into the tent ground stake extensions.
 
Next up, a lighter weight model Black Diamond tent for rainy weather, the Black Diamond HiLight 2 person tent. Hike safe and I'll see you on the trail-- Campingman
 
 
PS- Here's a quick tipWhen attaching the exterior cover for your tent, spread the gray mesh section over the front door and life will be wonderful.

Friday, October 26, 2012

Black Diamond Stormtrack 2 person tent


Harsh Weather Tents

Good Morning,

Having just returned from my latest foray into the wilderness on a short hunting trip, and I would like to take some time and share a bit on tents. I know I've previously spoken on tents for one or two people as well as family tents. Mostly just good all around general tents, for general use. What about a tent for the snow? Fall hunting season generally happens when the first snows begin to fall, so today, I am going to start a series on tents that are more for the winter. Having just returned from a trip, I am able to share some of my experiences. Now, keep in mind, that ANY tent can be used in pretty much any weather if: Properly water proofed, supported well, (in case of snows) and insulated. My point here, is why go to all of that bother if you can have a tent for the season you are hiking/camping/hunting in?

In the next several days, I will cover a few tents from Black Diamond, Mountain Hardwear and maybe even a Kelty tent or two. You can see, that I pretty much stick with these manufacturers, as over the years, I have had great luck with all three so I pass along my experiences. That being said, I am going to start off with the Black Diamond brand of tents.
Black Diamond Stormtrack 2 person tent
I like this model, for several reason's. First, it won the Backpacker Magazine's Torture Test.  To start with, it is a four season, free standing, double walled tent. Black Diamond refers to this particular tent as their "Base Camp" shelter. They are not kidding. The reason? It's double walled design. This in itself, helps to not only insulate, but withstand the toughest weather. You can set the tent up, almost anywhere and find yourself protected from the elements. If you need to hunker down, in really bad weather, and you can't get to a more sheltered area? No problem, this is the tent. 
If you just want out of the snow, the rain, or just plain cold weather, this Black Diamond Stormtrack tent fits that need. 


With adjustable front and rear top vents, there is plenty of airflow. The double wall design features 3 poles  for speedy setup and stability in high winds. It's noted by Black Diamond, as "50/50 sleeve/clip fast pitch hub set up." The double end doors allow easy entry, plenty of gear storage (the vestibules are plenty roomy for storage) and cooking space. How much space you ask...it's nearly 7 1/2 feet long (this is sleeping space only, the vestibules add more length, you can use for storage). This tent's sleeping area is just over 5 feet wide. The door fly is taped, 2500 mm polyester and the floor itself is 5000 mm nylon. With that in mind, remember the "Tube Tent/ground cover" I spoke of in an earlier blog? Well, here is a time to use it. Spread it on the ground under you tent before setup, for just that teensy bit additional insulation form the cold. You won't be sorry you did.
My next post will be on the Black Diamond line, once again The "Squall" 3 person tent.. Stay safe and I'll see you on the trail-- Campingan